CAD Blocks categories
 3D models
 home furniture
 sanitary ware - bathrooms
 professional equipment
 doors and windows
 people and animals
 plants and trees
 vehicles - transports
 architectural details
 mechanical - electrical
 urban planning - civil works
 safety health construction
 accessible design
 drawing sheet
 signals
 construction machinery
 accessories and objects
 maps and street maps
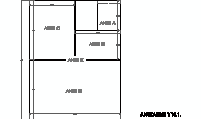
Free Tolerance and Projection Blocks for A, B, C, and G Sizes

size: 32 kb
category: drawing sheets and presentations
description: tolerance and projection blocks designed for A, B, C, and G size drawings, adhering to ASME Y14.1 standards. The layout includes a third-angle projection symbol and fields for specifying tolerance requirements or projection methods (first or third angle), ensuring clarity in technical documentation.
file extension: .dwg CAD - AutoCAD software
ASME Y14.1 Title Block for A, B, C, and G Sizes
Download Tolerance and Projection Blocks (.dwg Format)
Download free .dwg CAD files for tolerance and projection blocks tailored for A, B, C, and G size drawings. These blocks are compliant with ASME Y14.1 standards and include precise fields for tolerance specifications and projection methods, ensuring accuracy in technical and engineering documentation.
Key Features of Tolerance and Projection Blocks
The tolerance and projection blocks include essential components designed for clarity and standardization:
- Projection Symbol: Includes the third-angle projection symbol, critical for indicating drawing orientation.
- Tolerance Fields: Dedicated spaces for specifying tolerance levels to ensure precise manufacturing and design.
- Dimensions: Overall width of 3.00 inches, with field heights of 0.25 and 0.75 inches, designed to fit seamlessly within standard title blocks.
These features ensure compliance with professional standards and improve the usability of engineering drawings.
Applications in Engineering and CAD
Tolerance and projection blocks are widely used in mechanical, architectural, and industrial design projects. By defining projection methods (first or third angle) and tolerances, these blocks enhance precision and standardization. They are especially valuable in CAD systems like AutoCAD, ensuring that digital and printed designs align with industry practices.
The Importance of ASME Y14.1 in Standardizing Projection Blocks
ASME Y14.1 was developed to provide consistent standards for engineering documentation. Tolerance and projection blocks are integral to this standard, offering a universal format for specifying tolerances and projection methods. Their adoption has improved clarity and consistency across various industries, enabling seamless collaboration on technical projects.
Frequently Asked Questions about Tolerance and Projection Blocks
Q: What is the purpose of tolerance and projection blocks?
A: They specify allowable tolerances and projection methods (e.g., first or third angle) to ensure precision and clarity in technical drawings.
Q: Are these blocks specific to ASME standards?
A: Yes, they are designed to comply with ASME Y14.1, ensuring compatibility with A, B, C, and G size sheets.
Q: Can these blocks be used in CAD software?
A: Absolutely! These .dwg files are fully compatible with CAD platforms like AutoCAD.
Q: Are the dimensions fixed?
A: Yes, the blocks are designed with a width of 3.00 inches and proportionate heights of 0.25 and 0.75 inches for standardized use.


